Posts Tagged ‘craft ideas’

How to.. make a No Sew new Tee out of an old favourite Tee! (Guest Post)


The lovely Helen from Ickle Babe makes a range GORGEOUS gifts, from baby quilts, to bunting, to Aprons and New Home gifts. You simply have to pop over and check it out! I knew that ANY Guest Post from her would be a winner and a winner it is! Ever had your child grow out of a favourite t-shirt that tearfully had to be packed away? Look no further, re-use key features and make a new one. Not only is it clever, cut and fun, it is NO SEW! Hurray!

Recycled Tee Project!

This make was inspired by the lovely Milly, at a year and a half her most favourite thing in the world is her Lola tee. She Loves “yoya” (lola) as she calls her , and wears this top constantly, patting her belly as she runs about, as if Lola is actually playing with her. Its very cute! But unfortunately, we all knew the day would come… it’s getting to small.

So I have decided to re-cycle it, it was super easy and Milly LOVES it, maybe even more now that she did before. I figure I can just keep doing this until “yoya” falls apart or when Milly gets bored of her and wants a boyfriend instead ;P So here goes…..

You will need…

  • A sharp pair of scissors Pinking shears (optional)
  • An old t-shirt
  • A plain new t-shirt
  • A sheet of BondaWeb (like big sheets of wonderweb, John Lewis or Ebay always has it )

1) First roughly cut around the pieces you want to feature . I used two old jumpers for this. One had Lola on it and as she looked like she was running away on the pic I cut a little bee and some flowers out of the other one to create a little scene. Find a background piece, this can be new fabric like mine or another recycled piece, you could even use the back of the old tee, as long as its in a co-ordinating colour from the new tee your putting it on to.

2) Using a hot iron, fuse the bondaweb to the pieces. All you have to remember here is to place the rough side on the wrong side of your fabric and iron for 4-5 secs using dry heat. Use the wrong side and you just end up with sticky bondaweb on your ironing board!

3) Cut around them carefully, I used pinking shears for an extra bit of texture, but you don’t have to if you don’t have any, normal scissors are fine.

4) Peel the back off the bonda webbing and arrange your “collage” on your new tee. Place a damp tea towel (make sure its a plain one, I did this with a red one once and dyed the t-shirt pink) over the piece and iron down. I find it easier to just put the iron on sections and leave for about ten seconds at a time and then move to the next. As if you just sweep your iron around you can disturb your pieces underneath.

5) Remove the wet tea towel, Give it a final good iron and leave fused pars flat to cool for about 20mins.

And there you have your new fully washable original *designer* tee!

 You could customise it further with buttons (I have some cherry red vintage ones to add to Milly’s) or ribbons. Very easy but very fun, you can let your imagination go wild. I have even saved some of the other jumper for customizing some jeans too, the possibilities are endless!

I think Helen came up with a fabulous way of recycling AND keeping little people happy! Fabulous!

Previous How Tos:

Super Cute Flannel Cupcake (Guest Post)


Tactile Felt Donuts

Delicious No Sew Lavender Bags

Make Scented Playdough

From T to Halterneck (Guest Post)

Easy & effective Fish Pinata

Simple but effective paper frames (vlog) 

– How to make a Flower Pom Pom (guest post) – simply gorgeous – use as wedding decor! 

How to make a Paper Envelope  

How to make a No Sew Bib (out of an old shirt)  

How to make a Fabric Mâché Bowl (from old scraps of fabric!)  

How to make a Paper Flower (from newspapers)  (guest post)  

How to Make a Cupcake from a Flannel (Washcloth)

 This was featured on UndertheTableandDreaming Lovely! As well on  Hurray!

Remember the gorgeous Guest Post that the wonderful Anjie from Pom Pom Emporium did for us a little while back – well if you don’t, simply head back in time and take a look at these beautiful Pom Pom Flowers.

Anyway, she is BACK and with yet another fabulous idea – these Flannel Cupcakes! How simple and yet how gorgeous are they!? Perfect baby shower gifts or stocking fillers or a “just like that” present. Inexpensive, fun, FABULOUS! Here we go:

cupcakes made from washcloths/facecloths/flannels

To get started you will need

  1. washcloth 
  2. Paper cup 
  3. Rubber band 
  4. Lollipop 

For the cupcake wrapper I cut a paper cup down to the required size. I estimated my paper cup should stand about 5cm (2″) tall. Resting a pencil on a box, of the desired hight and with it touching the cup, I turned my cup slowly to give me a perfect line. I cut the excess paper away. Alternatively you can find printable cupcake wrappers on the internet to download, but I decided my idea using paper cups was easier and held the washcloth really well.

To form the ‘cake’ from the washcloth just follow the photographic tutorial below or watch this very good demonstration video I came across by Jonathan Fong How to make a cupcake from a washcloth What a star!

I think these cupcakes would make a really nice ‘thank you’ gift for a teacher or alternatively a very easy project for a class to make. You could buy white paper cups and let children design and colour their own cupcake wrappers

paper cups, washcloths, rubber bands and lollipops

Resting a pencil on a box, of the desired hight and with it touching the cup, I turned my cup slowly to give me a perfect line.cut the excess paper away

Folding the washcloth to make the 'cake'  

Folding the washcloth to make the 'cake'

Rolling the washcloth to make the 'cake'

Rolling the washcloth to make the 'cake', put the rubber band in place to hold it together

Squeeze the base of the 'cake' to push out the centre to form the icing swirlPut a lollipop in the centre of the swirl to form the cherryFinished cupcake!

Gorgeous! Please do go and visit Anjie and check out all her other wonderful things!

Previous How Tos:

Tactile Felt Donuts

Delicious No Sew Lavender Bags

Make Scented Playdough

From T to Halterneck (Guest Post)

Easy & effective Fish Pinata

Simple but effective paper frames (vlog) 

– How to make a Flower Pom Pom (guest post) – simply gorgeous – use as wedding decor! 

How to make a Paper Envelope  

How to make a No Sew Bib (out of an old shirt)  

How to make a Fabric Mâché Bowl (from old scraps of fabric!)  

How to make a Paper Flower (from newspapers)  (guest post)  

Get Crafty – Aug 2010 – SUMMER!


Welcome back to the monthly Get Crafty feature. Design to inspire people to “Get Crafty”. Hope you find something lovely to make!

This month I bring you “Summer” – anything to do with summer – from trips to the beach to hanging out with friends to sunflowers and butterflies! Hope you find something lovely to make!

If you like what you see, do go and visit all the relevant sites – the crafty peeps would really appreciate it and they have so many other things for you to see!! Go on… you know you want to!

If you feel inspired, do embed the Get Crafty logo on your site – go to the Get Crafty tab and scroll to the bottom of the page for the code! 

Next Get Crafty challenge is “Yellow” – nice and easy! Sunflowers, Lemons, Birds, Giraffes, School Buses, Kites, Suns, Rainbows, once again, anything goes – your imagination once again is the limit!!!!
 
Submissions via the comments on this post by Saturday 28 August 2010.


Get Crafty with Children

Pinwheels

What is summer without a pinwheel. What is CHILDHOOD without pinwheels. If you can’t quite remember how to make them, visit Mari-Ann at Counting Coconuts for her beautiful Pinwheel tutorial. Lovely! This, btw, is a great way of recycle toddler art: if you have been painting with your toddler, you can use their wonderful creations for this too! They will love it!

Driftwood Boat

I love things made from nature’s finds. And driftwood is particularlybeautiful. Mary at Lavender and Linen made this beautiful driftwood boat. Take you kids to the beach. Go search. And Get Crafty!!!


Shells

This is actually a traditional Galician craft and it is lovely to learn more about another culture. So go and take a look  Meninheira over at Dalle un colino and have a go! (Use Google Translate to help you along a little…)


Window Display

Valerie over at Frugal Family Fun always comes up trumps with crafts for and with kids. Here she has  a quick, fun and very easy window decor craft using paints and coffee filters. What lovely birds and how they light up as that wonderful summer sun shines through! Valerie is the author of Frugal Family Fun Blog, where she posts daily about her obsession with inexpensive crafts, family activities, and all around good times on a budget!

Home Made Water Bombs 

Even the title of this blog is awesome “Making Memories, One Thing After Another” – with a title like that you know you are onto a good thing. Now this a very simple idea, but I can just hear the squeals of laughter and joy. Hop over to see how the made their Water Bombs! I think we will be doing this one at Opapa’s house!

Evolution of the Artist

As an advocate to Get Crafty, I am ashamed to admit that all my painting focus has been on Red Ted (2.5yrs), not on Pip Squeak (8mths). This post served as a lovely reminder to let Pip Squeak have a go too. We have. And we now have two awesome keep sake paintings in our hall way! Thank you! Summer is the best time of year to do this, as you can strip your little ones down and let them have fun! Like the idea of doing a background colour first! Hop over to For What It’s Worth and check it out!

Ice-Lollipop Stick Puzzle

Impress Your Kids” impressed me when I saw these super easy puzzles. After filling your bellies with lollipops this summer, make sure you save all the lollipop sticks. Then on a rainy day, rush indoors, grab some holiday snaps and make these super easy puzzles. Give them as stocking fillers at Christmas. Easy. Fun. Effective. Job done!


Paper Flowers

Lots of flowers around during the Summer months. However, as school term drew to an end and the Summer Holidays a, Jen at The Madhouse made these lovely flowers with her boys. These could serve well as a thank you to teachers or as a simple “I love you”  to a loved one. Love the fact that the petals are heart shaped and that Jen’s boy was able to make these by himself!

Cork Boats

Our very own little Cork Boats. We went to visit Opapa for some splashing in the paddling pool and came away having been Crafty! Hurray. Super easy to make and provides you with an excellent excuse to drink some wine…


Memory Jars

After a perfect summer holiday, what do you do? Come home and feel the back to school blues? Not anymore! Make these wonderfully simple Memory Jars! Put all your little special somethings in it and come back to them on a rainy day. They look so pretty and are a great way to “do something” with all those little collectibles. Fabulous. I saw these by Melissa at the Inspired Room and indeed was inspired!!

Animal, Vegetable or Mineral

The lovely Christine over at her blog has a host of Summer Time activities to keep the little ones occupied, happy and away from the TV!  In this post she shows us their fabulously crafty vegetable animals. My favourite is Marvin (featured) and Parsnip the Unicorn. Go and take a look and then have a go with your kids too. You can always kid yourself that they’ll eat more veg after or stop playing with their food… mmmh. Or check out Christine’s other fabulous summer time ideas!

Beach Art

Some of you may remember how much I loved the V&A project that I mentioned on Nature Get Crafty (scroll down to the bottom for it). Well, Jude at Artful Adventures did just that (unrelated to my post, I hastened to add – she is a wonderfully creative person!). So take a look at her fabulous article on Land Art involving kids. And when you are at the beach this summer, DO HAVE A GO! We are going with Red Ted in 2-3 weeks time and I can’t wait to get Arty!

Peg Butterflies

Cathy at the Nurture Store, does the most wonderful craft and activities with her girls. She came up trumps again with this very pretty butterflies – tailored to her girl’s crafting abilities and yet still turning out so wonderfully pretty. A summer without butterflies wouldn’t b the same, now would it? Do check her other activities too, lots of great ideas for you and your little ones!

start Night – Peg Friends

Wonder Mom at The Fantastic Fice Hockman blog has been hosting “stART Nights” for the children in the neighbour during these summer months. I think it is brilliant that she is sharingthe crafty fun amongst the children around her. So this summer, this is one of the things the kid’s made – a “box of cloth peg friends“. Summer is all about meeting new kids on your road, making friends and having fun!!

Get Crafty for Children (or with older children)

Ants

A summer picnic seems to always attract ants! But if the ants that came to our picnic were some of these, I wouldn’t mind so much.. Staci at Craftify It, shows us how!


Hi-ho apple-o game

If you are planning a long journey this summer or just want some new games to play at picnics or at home, why not try your hand at this fun hi-ho apple-o game? Kimberley at Bugaboo, Mini, Mr & Me shows us how.


Wooden Sun Crafts

This Wooden Sun really caught my eye, as it was so different and unique. We are shown how to make it over at Wabi-Sabi Wanderings. This would be a great woodwork project for boys and would look lovely in any garden! It would definitely bring some summer sun to the garden in those gloomy winter days.


Farm in a Bag

I told you Valerie comes up trumps, because here she is again,this time with something she made for her girls – a “Farm in a Bag” – or should I say the bag is the farm and you put all your farm things inside! I am telling you, once mine are that little bit older (next summer?) they will surely be getting one of these!


Sensory Sea Box

What a lovely and detailed how to. My Mommy Makes It not only shows us how to die rice but also how to make the mermaids and the sand banks and even the palm trees. A lovely sensory toy for your children. I think at the very least I will be making a mermaid, they themselves are ADORABLE!


I Spy

Michelle came up with super easy, super cute I Spy book to keep children entertained on those long car journeys (when all items in the car have already been spied)  or flights. If you think you are “not crafty”, then stop by here and think again. Simple, easy, effective. And be surprised but what words, letters and numbers your children already know… Michelle was!

Get Crafty for Adults (or older Children)

Bug Candles

Think of those lovely long summer nights. Think of those pesky bugs. No more. Make your very own pretty and effective bug candles a la Positively Splendid, they are indeed splendid!!!


Summer Sunflower Cushion

Summer is all about Sunflowers! This is the time of year tha they grow to their full height. If you missed out growing some this year, why not Get Crafty and make this gorgeous Sunflower Cushion? Or use the tutorial to make a little flower for your dress or hair? Dangerously Domestic Jen shows how.


Lollipop Soap

Ok, so which is it Lollipops or Soap? These deliciously refreshing looking loolies are in fact soap and not at all edible. Sigh. They do however look fabulous and would may be persuade the odd reluctant child to wash their hands more often. I am dead impressed. Pop over to Greanbean’s Crafterole and check it out now!

Get Crafty – Oooooh

Home made Ice Cream (no ice cream makers needed!)

Oooh, how CLEVER is this homemade ice cream? No ice cream machine needed and a “keep them busy” activity included. I am so giving this a go. Go on, check it out how Stacie over at Amazing Mess made it. Another one for our “holidays at home” to do list!


Rainbow Cookies

https://redtedart.wordpress.com/2010/06/09/book-cook-duckies-rainbow-by-frances-barry/ Back to our Rainbow Cookies! If summer isn’t behaving and we are faced with clouds and rain, make some of these rainbow cookies to cheer yourself up! Alternatively, if summer IS behaving, make some anyway!

Rainbow cookies

Jelly Watermelon Slices

I ADORE these Jelly Watermelon slices that Christine at Little Page Turners made. Summer is not the same without Watermelon treats and to make it crafty and fun you can make these out of Jelly and Limes. This is such a fun treat for any summer party or BBQ! She also made some fabulous looking Watermelon Cookies. Amazing.

Flower Sugar Cubes

Last but by no means least, is Denise at Snaffle Mummy. She made these fabulous Flower Sugar Cubes. Wouldn’t they be lovely at a tea party? She tells me that she has them at the office for her cups of tea. How wonderful to bring a bit of sunshine into the office.

Previous Get Craftys

  • July – Made by Man + August theme: Summer
  • June – Inspired by Nature + theme July: ManMade
  • May – All things Red + theme June 2010: Nature
  • April – Nominations Theme + theme May 2010: Red
  • Launching Get Crafty + theme April 2010: Nominations
  • How to… make a Halterneck out of a T-shirt (Guest Post)

    It looks like we have Guest Post month!! So many lovely people sharing their crafts with you on Red Ted Art. Hurray! This week we have the amazing Amanda from Unique Snowflake visiting. She came up with his ingenious way of converting an old T-shirt into a Halterneck for the ladies! Talk about fabulous recycling!

    Now to Amanda:

    I have had this T-shirt for years, it was a souvenir from my holiday in Florida which I bought as I loved its colour & motif but every Summer I take it out only to remember the reason I never wear it is it too restrictive at the neck and arms making you feel even hotter. But not this year, rather than it going to waste I’d have a go at transforming it into something more wearable.

    I hope this guide helps if you want to try as well, its my first how to so feedback would be great.

    The pictures are a bit dark I’m afraid as the camera didn’t pick up great detail from this colour t-shirt.
    Take one t-shirt to be re-fashioned one that is a snug fit works best, otherwise you may need to take in the sides.  Be brave take a deep breath & cut off the sleeves.Then remove the trim on the bottom inch of the t-shirt in one piece & keep, this will form the neck tie later on meaning you don’t have to stitch one.                     
    Lie the piece flat, if you wish you can draw a straight line across the body of the t-shirt under the neck opening, then cut along it.  Or like me you can just dive in and cut by guess work.

    Then turning the piece so the back is facing draw a line connecting arm hole to arm hole, and cut across the back or just cut away.

    The t-shirt should be looking like the below picture now, if you want to neaten the seams around the bottom now is a good time to do it, but I kept mine raw & they just roll up a bit at the bottom.

    Now we need to make the halter neck  piece of the t-shirt, lay the shirt front down and turn over the top front neckline by roughly one inch, stitch across this in a matching thread or use a contrasting one for a detailed effect, leaving openings at each end this creates the drawstring for the top.
    Take your trim from the bottom of the t-shirt & cut once so you have one long piece, then thread this through the seam.I did this by clipping a hair clip to one end & feeding it through, or you could use a knitting needle to push it through.  When pulled though to an even length tie a knot in each end of cord & runch front up.

    Then wear, sorry its a bit of a bad picture of me but hopefully you get the idea. I made this during an episode of Doctor Who so it’s a quick make to do & I love the fact that I get to wear my t-shirt now.

    Loving the Summer sunshine
    Amanda.x.

    I am entering Amanda’s Guest Post to:

    Visit thecsiproject.com

    Previous How Tos:

    Easy & effective Fish Pinata

    Simple but effective paper frames (vlog) 

    – How to make a Flower Pom Pom (guest post) – simply gorgeous – use as wedding decor! 

    How to make a Paper Envelope  

    How to make a No Sew Bib (out of an old shirt)  

    How to make a Fabric Mâché Bowl (from old scraps of fabric!)  

    How to make a Paper Flower (from newspapers)  (guest post)  

    Great stART: Piep Piep Piep or making watches with toddlers

     Welcome to another story+ art = great stART (for more on “start projects” visit the original A Mommy’s Adventure). I was fretting a little about this week’s story & craft project, as I have a couple of “complicated ones” up my sleeve, but also want to keep encouraging everyone to have a go. Mess is good. But no mess is also good.

    And then Red Ted pulled this book from the shelf! And inspiration came!

    Piep, Piep, Piep: Das Buch der Töne und Geräusche Piep, Piep, Piep: Das Buch der Töne und Geräusche, by Soledad Bravi. Originally in French, so get that if German is no good for you!  A lovely (soft?) board book – it has many images of different every day things and all the sounds that they make. I particularly like it that the “plug says – no no no!” and that the christmas tree sings “oh tannenbaum”. Fabulous. Simple. Red Ted (2.5 yrs) always make me sing to the christmas tree, but also likes many of the other pages. It is really nice that we can enjoy this book with Pip Squeak (8mths) too, as she loves the bright colours and the fun noises. Depending on the month, Red Ted has a different favourite page. Currently, we get stuck on the watch page (tick tack), mainly because I showed him an old Swatch Flick Flack that used to be mine and told him once it has a new battery he can have it.

    We were also given a read the time activity book which he loves drawing in.Needless to say, he hasn’t got a clue and cannot tell the time. He is not a wonderchild, but the point is, he is taking an interest in time. And we talk about time. And I tell him what time we do what.

    So. The craft project. This is super easy.It took 2 min per watch. We made them more on a whim than anything else. I just realised that, I made them all. Mmh, I guess Red Ted gave me instructions (mainly “more”), but we did discuss time (what time shall I do next, Red Ted?) and he did want some for his friends. And you do learn through watching?! Below there are some more crafty suggestions.


    1) Materials: Loo Roll, Scissors, Paper, Pen, Sellotape 

    2) Cut a strip of loo roll: the armband 

    3) Cut a circle and draw a watch face 

    4) Sellotape on (you can glue it, but takes a while to dry! 

    DONE! 

    Variations: 

    • let your toddler decorate the wristband and watch face:
    • decorate loo roll: with feathers, fake gems, paint, pens, whatever takes your fancy (avoid glitter with this one, you will have it ALL over the house)
    • instead of loo roll, cut a strip of coloured card and sellotape it – good for older childrenwith bigger wrists.
    • Maybe you can be SUPER crafty and with a pin make a moving clock arms

    This was freatured on Beyond The Picket Fence   and  

    Previous Crafts: 

    stART:  Bear Cards & Strawberry Growing Video 

    stART: Touchy Feely Book – That is not my Puppy 

    stART: Jolly Postman & Greeting cards from Toddler Art 

    Book & Cook – Duckies Rainbow & Rainbow Cookies 

    stART – Story Telling, Bunnies & Stars 

    stART: Giraffe’s can’t dance – a Giraffe Loo Roll Marionette 

    stART: Chick – a Pop Up Card 

    Book & Cook: Alphabet Cookies – Learning through play 

    stART: Busy Airport – Cotton Wool Clouds and, erm, PIGS! 

    stART: Hit &Myth – a mix & match book for older children (>5yrs)     

    stART: Story & Thank you time – inspirational thank you cards    

    stART: Hurray for Fish – one for babies or messy toddlers!     

    stART: Bedtime Star – Red Ted, makes a starry night for Pip Squeak’s nursery    

    stART: The Way Back Home, Oliver Jeffers – Red Ted makes a plane and a UFO    

    Craft: Peg animals – toddlers can help! 


    How to… make Felt “Strawberries & Cream” & Gingerbread Men!

    With the Wimbledon Tennis on at the moment, you may want to indulge in some “Strawberries & Cream”, or if that isn’t quite your thing, why not take a chomp out of this Gingerbread man – after Sunday’s World Cup performance, maybe the “England” shirt needs to come of very quickly – why not replace it with a Stars & Stripe one in type for 4th July?!

    The lovely Aly from Life’s Laundry shows us how (hop over to see how to make felt cream!). If you like what you see, do go for other craftiness – e.g. she has a great door stop owl or just visit for a great read!

    Scroll down to the bottom to see my, erm, attempt. I didn’t actually have any felt in the house….. Recycle away! Now to Aly!

    Hi!

    I’m Aly from LIFE’S LAUNDRY.Maggy approached me to ask if I would fancy doing a guest post tutorial on felt food for Wimbledon and the World cup.I designed a gingerbread man myself.The strawberries are a smaller version of the large one I did for Get Crafty May 2010.

    Strawberries & Cream

    You will need:

    • Red, green and white felt.
    •  3 or 4 circle templates (an egg cup, a mug or a pair of compasses and pencil, anything with a circle).
    • Red and yellow thread.
    • Fibre fil (or felt off cuts if you want to cut down cost and waste).
    • Pins.
    • A sharp needle.

    Optional:

    • Buttons.
    • Beads.

    1. Cut out as many circles of different shapes as you want.Each circle makes 2 strawberries.Cut the circles in half to make a semi circle.

    2.Take a semi-circle and fold in half.Sew along the straight edge using red thread.

    3.Repeat with the others.Then turn inside out.

    4. Using yellow thread, sew little lines intermittently to represent the seeds.You could use beads, remember not to give the strawberry to a child under 3.

    5. Sew a running stitch a little way in around the circle edge.Make sure the knot from the thread is the inside.Repeat with others.

    6. Now gently pull the thread until it starts to gather.Stuff with fibre fill/ cloth.Repeat with others.

    7. Pull the thread tightly and over sew around the edge.Repeat with others.

    8. Now cut out a rough star shape from the green felt to make the leaf on top.Sew on using a large cross.Over sew underneath the leaf to keep it neat.

    Repeat until you have done all the strawberries. Click here for how to make felt cream.

    Gingerbread man mascot

    You will need:

    • Mid-brown felt.
    • White felt.
    • Red felt.
    • Brown thread.
    • Red thread.
    • White thread.
    • Buttons or beads for eyes.
    • Pins.
    • A sharp needle.
    • A pen.

    1. Using a gingerbread man cutter as a template, cut two bodies out of brown felt.

    2. I hand drew the shirt on to tracing paper first using the gingerbread man template underneath to judge how long to have the sleeves and the T-shirt length.I cut out a front and a back, drawing a yoke on the front shirt and a rounded neck on the back shirt.The cross I drew free hand, tidying up with a ruler. 

    3. Pin the two body shapes together.Sew all around, except the head using brown thread with a blanket stitch.Draw on where you want the eyes and mouth to be.I stitched the mouth and used buttons fro the eyes.You could use beads if use wish or felt.Lightly stuff the gingerbread man with fibre fill or material off cuts.I used a chop stick to push the stuffing into the arms and legs.Blanket stitch (see drawing) around the head. 

    4. Now to make the England T-shirt.Pin on the cross.Using red thread neatly sew a back stitch around the cross. 

    5. Now pin the back on top of the front, so the cross is sandwich in between the two body shapes.Neatly sew around using a running stitch with white thread.Do not sew the neck,body and arm openings. 

    6. Turn the T-shirt back the right way.Now put it on your gingerbread man mascot. 

    I hope you enjoyed my tutorial, and I hope have fun making your own. 

    Aly of  

    LIFE’S LAUNDRY.

    I really do hope that these inspire you to have a go, it is so much fun and so simple. As always, I try (!) to have a go at my Guest Post’s crafts. I didn’t have any felt, so I, erm decided to recycle an old pair of Red Ted’s jogging bottoms (already with holes and splattered in paint). It actually came out quite well (after I decided to sew on the eyes, as buttons made our gingerbread man look like a voodoo doll!). Interestingly, Red Ted LOVED watching, “had a go himself” (I vigilantly watched over him as he “played” with the needle) and ADORED the final product – but I believe only because he watched it being made… Oh and I filled mine with old carrier bags (2.5 to be exact!).  I love it when you combine recycling with craft.

     Ok… and then my felt arrived! So I had a quick go at the strawberry too. My only comment is, that I used a glass as a measure, out comes a lovely strawberry, but a little small for Pip Squeak, so will prob try something bigger next! I do LOVE how tactile mine turned out, I used embroidery thread for the seeds and it feels lovely!!

    Now go and Get Crafty!

    Previous How Tos:

    How to make a No Sew Tea Towel Kid’s Apron

    Easy & effective Fish Pinata

    Simple but effective paper frames (vlog) 

    – How to make a Flower Pom Pom (guest post) – simply gorgeous – use as wedding decor! 

    How to make a Paper Envelope  

    How to make a No Sew Bib (out of an old shirt)  

    How to make a Fabric Mâché Bowl (from old scraps of fabric!)  

    How to make a Paper Flower (from newspapers)  (guest post)  

    story + art = Great Start – The Jolly Postman & Simple Postcards

    Posting

    This is story + Art rolled into a geography lesson rolled into learning about “Mr Postman” rolled into having a little fun rolled into excited Red Ted rolled into an excuse to explore mainy new books…. What am I talking about? Playing By The Book’s international Postcard exchange!!! The exchange did take place a few weeks ago. I am very late with this post! This is going to be a long post… so just skip to the bits you like!

    1. The world
    2. The crafty bit
    3. The learning about the post office bit
    4. The post related booksThe exciting bit
    5. The world

    1. The world. I started off this “ongoing” activity with Red with looking at a map of the world with Red Ted. Red Ted didn’t have a clue what I was trying to show him. Well he is only two.

    2. The crafty bit. So we started with making our postcards. As this is an international exchange we thought it would be nice not just to make them, but also to make them “London”. I first drew a london scene, hoping Red Ted would “colour it in” (as per Thank You cards). Not interested. Oh.So, new approach: the old cotton wool & peg approach (see Clouds& Pigs and Chicks). He LOVED that. I gave him 2 colours: Red (for buses) and Green (for trees). Some blobs were duly created. I then gave him more paper for a “free for all” – which I decided look rather like a Rex!Once dried I drew outlines of London buses and trees (London apparently a city with rather a lot of trees in it!).Then I wrote the cards.  

    This a great way in general to “recycle” a toddlers paintings. I recently took a whole bunch of “water colours” and found “shapes” in Red Ted’s drawings, making new Greeting Cards with little bird designs on them… Brilliant for father’s day or grandparent’s thank you notes.

    cards


    Greeting Cards from Watercolours


    cards


    Card


    3. The learning about the post office bit. I talked to Red Ted about what we were going to do with the cards (he has posted stuff before, but more by the by). So we went together. I showed him how we weighed the cards. Then gave him the stamps to stick on (with some help). Then he got to stick them in the post box.

    The Jolly Postman

    4. The post related books. I then got hold of 4 vaguely “post” related books (see review earlier in week). Our favourite was The Jolly Postman, by Ahlberg. It is the simple story of the postman delivering letters and postcards to lots of very familiar fairytale people! What Red Ted LOVED about this book, as that every other page contained an “actual envelope” that he could take a letter out from. He wasn’t that interested in the content of the letter yet. Still a little young, but that is fine, as it means we will still be enjoying this book in 2-3 years time!

    5. The exciting bit. Our postcards started arriving, both the ones sent to us and the ones abroad! Red Ted loved his cards – I showed him his name and read them out to him and we “discussed” the picture on the front. Bless. We got one from Shropshire, one from New Zealand, one from Spain and a letter and photos from the US! Lovely. And finally 5th card arrived from San Franscico!

    Received Cards

    6. The world. Now, I know I said that Red Ted, aged 2 and 1/4 didn’t get “the world” bit, I still decided to revisit it! Afterall, learning through repetition and familiarity and all that. This time I pointed to the countries that we sent cards to and that we received cards from. As well as countries were our relatives and friends live (Canada, France, Austria, Germany). He still just stared at “the pretty colours”. But it is a start!

    We enjoyed our Postcard Exchange, a big THANK YOU to Zoe for all her hard work in organising this exchange (with over 250 families!!!!).

    Previous Craft Projects:

    – Book & Cook – Duckies Rainbow & Rainbow Cookies

    – stART – Story Telling, Bunnies & Stars

    stART: Giraffe’s can’t dance – a Giraffe Loo Roll Marionette

    stART: Chick – a Pop Up Card

    Book & Cook: Alphabet Cookies – Learning through play

    stART: Busy Airport – Cotton Wool Clouds and, erm, PIGS!

    stART: Hit &Myth – a mix & match book for older children (>5yrs)    

    stART: Story & Thank you time – inspirational thank you cards   

    stART: Hurray for Fish – one for babies or messy toddlers!    

    stART: Bedtime Star – Red Ted, makes a starry night for Pip Squeak’s nursery   

    stART: The Way Back Home, Oliver Jeffers – Red Ted makes a plane and a UFO   

    Craft: Peg animals – toddlers can help!

    Get Crafty – June 2010 – Inspired by Nature

    Hello! Welcome back to Get Crafty! This month’s theme was “Inspired by Nature”! My interpretation was the loosest possible sense: from drawings of animals and  trees to things made out of sticks and stones. Once again a WONDERFUL collection of crafts to keep you inspired the whole of the summer!

    If you like the look of something DO PLEASE show your appreciation by clicking on the link and thus telling the crafters that “you like”!!

    If you feel inspired, do embed the Get Crafty logo on your site – go to the Get Crafty tab and scroll to the bottom of the page for the code!

    Next Get Crafty challenge is “Made by Man” – we had Nature, now show us what Man can do – from robots, to cars, to rockets, to cardboard kitchens and dolls houses, to toddler handbags, to puppets – your imagination is the limit!!!! Submissions by 28 June 2010.

    Let’s begin

    Get Crafty with Children

    Doorstop Owl

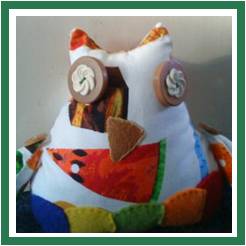
    Aly has made another LOVELY contribution to Get Crafty. This month she brings us this GORGEOUS doorstop owl! I want one. I have been oohing and aahing about doorstops for Red Ted’s room for ages and now I have a solution. Thank you Aly! Love it love it!


    Sugar Cookie Flower Pot

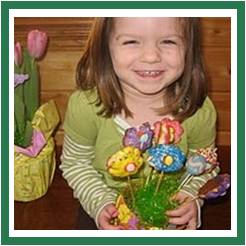
    Technically this goes into a “Kitchen Section” of Get Crafty (or Get Crafty ooooh), as these gorgeous little flowers are not just decorative, but EDIBLE! How is that for some craftiness. Rhinestones & Pine Cones tells us more…

    red

    Craft Butterflies

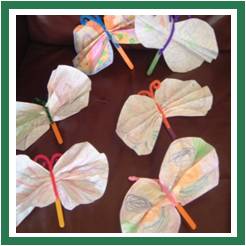
    Jane over at Fired4U made the cutest little butterflies with little mini potter. Wouldn’t these look great as a mobile? Or just individually dotted around the house. Lovely!


    Name Garden

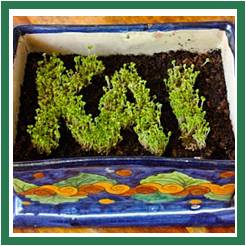
    Getting crafty in the garden! As this is Nature Get Crafty, how can we not venture out into the garden without being creative. I just LOVE this little project – perfect for thos amongst you with little ones learning to read and write – a double whammy reward: see the seedlins grow and watch your name emerge. What fun! More gorgeous stuff from Ariella at Childhood Magic!

    Egg Shell Mosaic

    Ok, I know that Easter is over, but Ithought this idea was so simple and ingenious that it had to go in. Hopefully for everyone to remember next year. Also, Jen at Paint Cut Paste has a marvellous set of other craft ideas, so do please please check out her blog! It was REALLY hard to “choose” what to post…

    Dandelion Field

    What would Nature Get Crafty in May/ June be without some dandelions?! Red Ted is loving dandelions and whenever we spot one it has to be picked!Playing by the book doesn’t only show us how to make our own dandelions, but Zoe and the girls review a fabulous little books for us, plus other dandelion links (cookies, syrup, costumes etc!). Go take a look! (Oh and I found some Dandelion Jam here…)

    Twig Easels & Dragonflies

    Lisa at 5 Orange Potatoes brings us 2 for 1 – two lovely ideas for crafts with twigs! The dragonflies are super quick to make and will keep your little ones entertained for a little while. Hope over to Lisa’s blog and take a look at her easel too. How simple. How fabulous!

    red

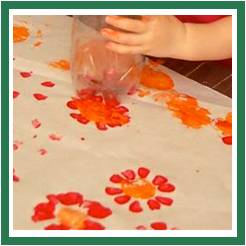
    Bottle Print Flowers

    Now, I really wanted to use “the final” images as these flowers are so pretty, but, even more I wanted to use one of the “action shots”. Valerie’s girls look like they were having SO MUCH fun that I can’t wait to try this with Red Ted, as soon as possible! Valerie is the author of Frugal Family Fun Blog , where she posts daily about her obsession with inexpensive crafts, family activities, and all around good times on a budget! You can read more about her at http://www.frugalfamilyfunblog.com – go on, hop over and see what else they get up to!!!

    Kitchen Roll Flowers

    Nicole, who brought us that ingenious Paper Flower How To, now brings us these lovely Kitchen Roll Flowers. Now, these look SO good, you would have thought they’d go in the adult section. But go and check out the instructionsand I am SURE You can make these with your children. They look so simple and sweet. I am saving some cleaning product squirty bottles, so I can make my own “colour dispensers” and will have a go. I know Red Ted will LOVE squirting he colour….

    Fairy Garden

    I knew the Nurture Store would come up trumps again, as Cathy is always coming up with new and creative ideas, some simple, some ingenius and some that childhoods are made of! Here is her little girls’ Fairy Garden! This will no doubt remain a treasured memory for many years to come! Hope the fairies stay too! (I particularly like the blue stone path.. and the execution of the post! Lovely).

    Chick Chick

    One of “my” submissions, Red Ted and I made these as part of our story + art series of crafts, as well as in anticipation of Father’s Day. The chick’s peak moves when you open the card! Hurray! Very simple to make and will really please your children!

    Nature

    Paper Tulips

    These paper tulips are simply lovely! Who says you should “just” give them at mother’s day? Surprise Granny or Mummy at any time of the year. Go check them out over at Mini Cuties!!


    Get Crafty for Children (or with older children)

    Meteorite

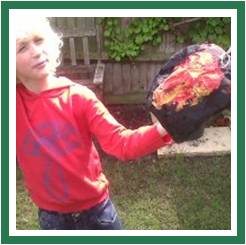
    I love this project! It actually started off as a project for Red Get Crafty (so I am told), which went wrong, but the craftiness and high spiritedness of the 7 yrs old, turned it round and made it into this FABULOUS meteorite. Read more about what happened here!

    red

    Rain Catcher

    Love this take on “Nature Get Crafty” – At The Madhouse, they are “interacting” with nature by making this super simple, but fabulous rain catcher! I love the rain marker that they made and that they will be using this to lear about the weather but also some maths!


    rain catcher

    Giraffes

    As part of my weekly craft session Red Ted and I made these Giraffe marionettes. Ok, so I made them, but Red Ted helped paint, stick and fold and he most certainly loves playing with them. Hurray. Take a peak here.


    Counting Owls

    I LOVE these counting owls over at Counting Coconuts by Mari-Ann, which is FULL of fab Montesorri inspired crafts for kids. Go and check it out. I will def be off buying some felt to make some for us! And I will definitely be dipping in and out of Mari-Ann’s great ideas!


    Get Crafty for Adults (or older Children

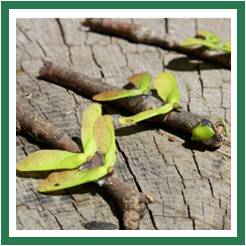
    Nature’s Buttons

    Oh My! How GORGEOUS are these. So simple and so effective! THese are definitely something to be made with older children or as a fun project for yourself. Ariella at Childhood magic, shows us the way!


    Strawberry & Flower Bookmark

    Cara over at Freckles Family, was a little late with this entry for “Red” – luckily it still fits with “Inspired by Nature”. So here we are! I think that this is simply the cutest little bookmark and I will SOOOO be knitting one of these once I have finished a couple of other little crafty projects. Great one for using wool leftovers! Go on, check it out!

    Fruit Bowl Batik

    I remember Batik attempts from my school summer fete days. I don’t actually remember any of the results. But Anji at Pom Pom Emporium, makes it look easy (enough) and fun. Definitely worth having a go with older children? Or just for yourself!! 

    red

    Get Crafty – Oooooh

    Zingy Zangy Lemons

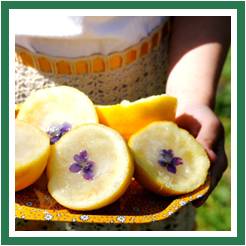
    Very Get Crafty in the Kitchen! In the spirit of nominations these mouth watering lemons were submitted by Diary of a First Child on behalf of Gardenmama. Just looking at them makes me think of lazy summer days. How refreshing these must be. Visit Gardenmama for more info!!


    Violet Jam

    Another kitchen craftiness that I couldn’t miss out. Violet Jam! Violets are so pretty and so beautiful that the process of making this jam feels like art itself. I love connecting with nature this way – making things out things that are freely available! And the recipe is so simple too! Please go and visit Soule Mama for more info!!! (Oh and I found some Dandelion Jam here…)

    Butterfly Cake

    Tania over at Lavender Bay shows us that you need no excuse other than butterflies in your tummy to make a goreous cake creation! Yummy. Pop over and say “hello” – she is new to blogging!!


    Inspired by Nature Art

    I couldn’t resist sneaking in some “arty farty” stuff on the topic of “Nature”. These simply embrace the concept so well! I hope you don’t mind, but enjoy!!! (Don’t get TOO inspired by Ofili..)

    Chris Ofili

    What could be more inspired by Nature than Chris Ofili’s elephant dung paintings! Yes, that is right, Chris Ofili is renouned for his work with elephant  dung, I thought I’d share these with you :-). This one is Strange Eyes 2001, but to read up on more! More on Mr Ofili himself here on Wikipedia!

    World Beach Project

    How fabulous is this a WHOLE WORLDWIDE project invovling pictures & sculptures made from stones! I have shown the Sue Lawty’s own contribution. But come to the V&A website to read more and see more fabulous creations! Take part even! “Devised by artist Sue Lawty in association with the V&A, the World Beach Project is a global art project open to anybody, anywhere, of any age, building on the experience many of us have had on holiday of making patterns on beaches and shorelines.”

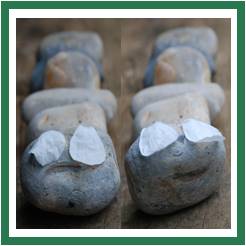
    We couldn’t get to a beach, but still wanted to “take part”, so friends of ours brought us some Brighton Beach stones and we got Inspired by Nature at home.. these are our “hungry & happy caterpillars” – using the same set of stones. We had lots of fun playing with them in the garden. No doubt we will paint them ONE day..

    Red

    Elephant Family Org

    A charity fun raiser and art “installation” in London Town… I think these are particularly “fun” for young children, so though  would share these with you. Being “stuck at home” these days, I am showing you Sarah’s Bass’s photo. She managed to find 10s if not 100s of the elephants! Go visit her site www.monstersandmonkeys.com.

    Previous Get Crafties:

  • May – All things Red + theme June 2010: Nature
  • April – Nominations Theme + theme May 2010: Red
  • Launching Get Crafty + theme April 2010: Nominations
  • How to… make Fabric Pom Pom Flowers (Guest Post)

      
     How lovely! This post was featured on   New NostalgiaWell, Anjie did do a rather grand job, no?!
      

    Fabric Pom Pom Flowers

    How wonderful! Anji over at the Pom Pom Emporioum has made this WONDERFUL tudorial for us! Scroll down to the bottom, to see my “quick and ready go at it”! And now to Anji:  

    Hi my name is Anjie, over from http://www.pompomemporium.com/ doing a guest blog exchange with Maggy.   

    Fabric flowers – Alliums from pom poms  

    Last week I wanted to make some pom poms from fabric, in particular try out some purple organza I had. I have noticed fabric pom poms seem to be a popular decoration at weddings at the moment, I get a lot of hits on my website from search engines looking for fabric pom poms for this purpose.  

    To start with I tore the organza into long strips (the width of the fabric) of about 1.5cm wide, tearing makes the fabric nice and ‘hairy’. From the strips I made my pom pom in the traditional way, winding the fabric round and around two cardboard discs (a basic pom pom tutorial can be found here.   

    The finished pom pom looked like an Allium flower, it just needed a stem.  

    Wooden skewers from my kitchen fitted the bill, just the right size, a quick coat of green acrylic paint and I had a stem.  I  was very pleased with the result so I made two more. White pom poms given the same treatment might look like dandelion seed heads.  

    Organza strips


    Winding the Pom Pom


    Cutting the Pom Pom


    Painting the Stems


    Aren’t they simply GORGEOUS? I love the so simple idea of painting the stems by holding them in place with blue tack. I tried these with “normal” fabric and it doesn’t work, as it is too thick! So it really has to be organza – especially for that whispy look. Not having any organza and wanting to give everything a  go, that I post,  I did it with some tissue paper: Not as amazing, but still pretty. Thank you Anji for your FABULOUS post! Please DO pop over to Anjie’s as a “thank you” and explore the other wonderful things she makes!  

    My attempt: Tissue Paper Pom Pom

    More “How to…”s: 

    How to make a Paper Envelope 

    How to make a No Sew Bib (out of an old shirt) 

    How to make a Fabric Mâché Bowl (from old scraps of fabric!) 

    How to make a Paper Flower (from newspapers)  (guest post) 

    story + art = great stART – Giraffe’s can’t dance

     This week’s book & craft has been “brewing” for a while…  I am not sure why haven’t done it sooner, maybe I thought Red Ted was still too young. Well, he is in terms of  crafting, but he isn’t in terms of painting, sticking, helping and of course PLAYING! So, we embraced the craft – a great one for children 5yrs+ or with a helping adult!!! Red Ted loves the resulting marionettes!!! Without a further a do… 

    The story. 

    Giraffes Can't Dance Giraffe’s Can’t Dance, by Giles Andreae. Early this week, I already reviewed “Giraffe’s Can’t Dance”. Here we have it again: I have to confess to picking this book up, because I like the “format”. Our version is a smallish board book. I also liked the rhythm and rhyme of the book and Red Ted liked the bright colours. Here we have the story of a Gerald the giraffe that is, well, a little clumsy on his feet. Each year the jungle holds a jungle dance and Gerald feels left out has he is so “rubbish”. Sadly he wanders off… however, a small cricket helps him discover his “inner self”. A lesson: we are all good at something, as long as we find the right way for us. Hurray! Happy Ending. 

    Today we are going to make Gerald! The materials are very simple! 

    1) Materials: 2 loo rolls per Giraffe, 1-2 sheets of A4 in contrasting colours (red & yellow in our case), paints (red & yellow, I prefer acrylics as they don’t get so dry and crumble like some poster paints), brushes, scissors, glue and later chopsticks and string (not shown in photo, as only decided to add these later) 

    2) Paint two loo rolls yellow. Red Ted decided he “wanted” red, so I decided to make 2 giraffes with him. So we painted another 2 loo rolls red. I helped him, as he was getting a little tired! 

    3) We then dabbed on some spots in the contrasting colour with cotton wool. I think lots  of paint gives it nice “texture”. 

    4) Let it dry. 

    Start on the legs. 

    5) I didn’t have yellow paper, so I quickly “made” some with cotton wool and watered down paint… Just means you have to wait for it to dry. I only did one side. Don’t think it matters if one side is white and the other yellow. If your children have a longer attention span, they can help with this too! 

    6) Cut the paper in to even strips. I made mine about 1cm wide and used a ruler to help me (marked one sheet, but cut four sheets in one go). The neater and more even you cut, the better! 

    7) The “tricky bit”: Take one yellow and one red strip. It is kind of like pleating the two pieces of paper. Glue down the first two bits and then alternately fold over. Once you get to the end of the paper, I glued on another strip.  So each leg and neck is made of 2 yellow strips and 2 red strips of paper. Glue top down. 

    8) Make 5 for each giraffe (so we made 10 – got a little boring, I admit). Whilst I folded. Red Ted did some play gluing and play folding with extra strips of paper! I also made 2 smaller sets (about 1/2cm wide) in one colour for the horns and cut out some “ears”. 

    9) Cut down one loo roll for head (about 2/3rds) 

    10) Glue legs and neck on. I used cloth pegs to keep them in place whilst drying. 

    11) Glue on horns, ears and draw eyes/ stick on googly eyes 


    I found at this point that the giraffes were finished, but no so  easy to play with, as the neck kept flopping about. So I decided to make marionettes out of them – I used some take away chopsticks (but lollipop sticks will do) and garden string! 

    12) FINISHED! 

    We then revisited the story at bedtime. Red Ted was delighted! And the Gerald and Geraldine have indeed been doing LOTS of dancing!

    And here, erm, we had some fun. Sorry for the lack of editing… and the poncy music! Ha!

    I have summited this to Visit thecsiproject.com

    Previous Craft Projects

    stART: Chick – a Pop Up Card

    Book & Cook: Alphabet Cookies – Learning through play

    stART: Busy Airport – Cotton Wool Clouds and, erm, PIGS!

    stART: Hit &Myth – a mix & match book for older children (>5yrs)    

    stART: Story & Thank you time – inspirational thank you cards   

    stART: Hurray for Fish – one for babies or messy toddlers!    

    stART: Bedtime Star – Red Ted, makes a starry night for Pip Squeak’s nursery   

    stART: The Way Back Home, Oliver Jeffers – Red Ted makes a plane and a UFO   

    Craft: Peg animals – toddlers can help!